Reading Cross-Sections in 3D: Section Planes and Colour-Coded Slice Views
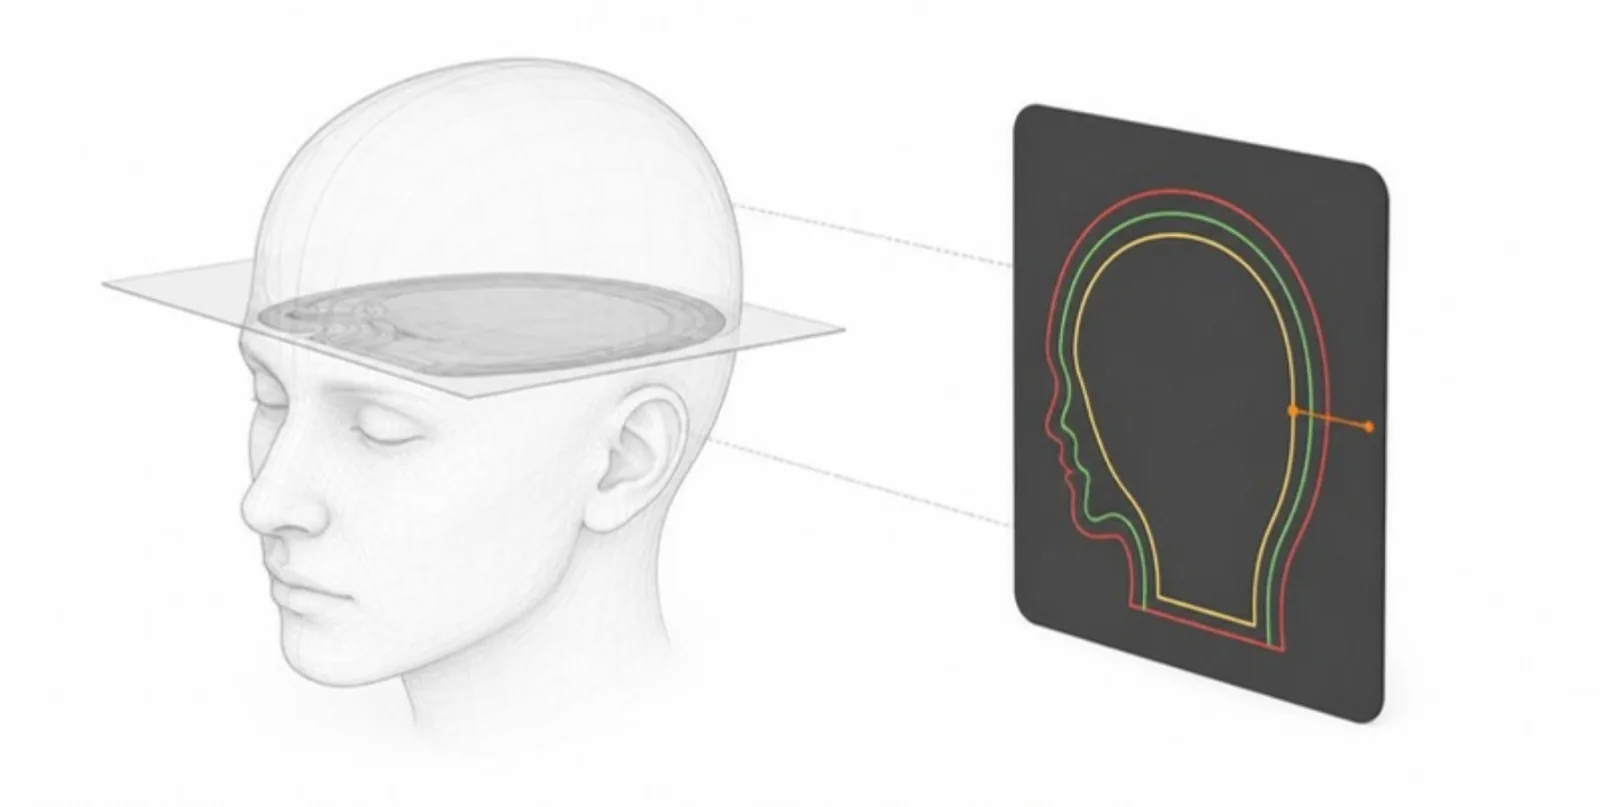
A 3D model shows the outside of things. Most of the interesting questions are about the inside: how a tumour sits against a vessel, how thick a wall is, how a shaft passes through a housing. Cross-sections answer those questions, and they are one of the oldest tools in both radiology and technical drawing. In AcademicAR they work directly in the browser.
The section plane
Open the Section panel and a plane cuts through the model along the X, Y, or Z axis. Drag it through the model and everything in front disappears, revealing the interior. A few details make it practical:
- Axis guides show where the plane is and how the model is oriented.
- Face turns the camera straight onto the cut, so you look at it squarely instead of at an angle.
- The cut respects the Layers panel: hide the skin and cut only the skeleton, or keep a faded outer shell for context.
The 2D slice view
Next to the 3D cut, the slice view draws the cross-section as a flat 2D image. Each structure’s contour is drawn in its own layer colour, so in a segmented scan you can immediately tell the liver from the portal vein from the vertebra — just like a colour-coded segmentation overlay in a medical imaging workstation.
For scans, the slice view follows the conventions clinicians already know:
- Plane colours follow the 3D Slicer convention — axial red, coronal green, sagittal yellow.
- Orientation labels (R/L, A/P, S/I) sit at the edges, laid out in the radiological convention (patient right on the left of the screen).
For CAD and architectural models, it uses the familiar engineering colours instead — X red, Y green, Z blue — with plus/minus axis labels.
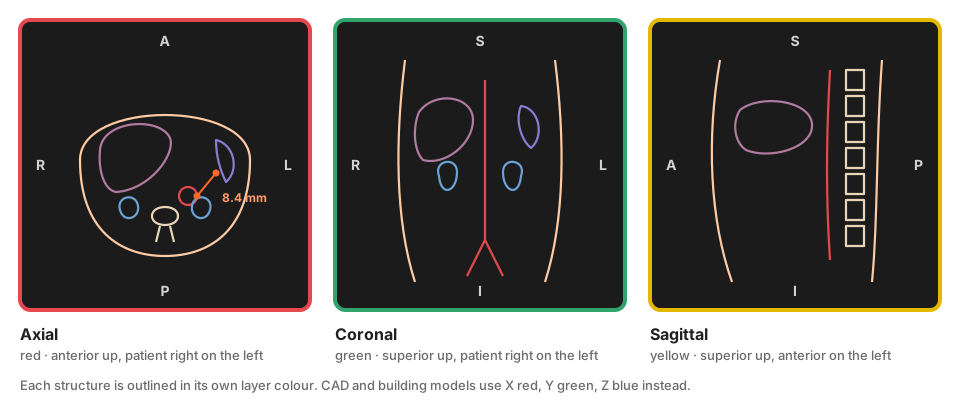 Slice view conventions for scans: each structure in its own colour, Slicer plane colours, radiological orientation.
The slice view supports zoom and pan, shows a scale bar, and reports which structures the plane currently cuts.
Measuring on the cut
A two-point measure on the slice view snaps to the contours, so you measure wall thickness, a canal diameter, or the gap between two parts precisely on the section, not on an arbitrary surface point. Points that fall outside the solid — in a gap between parts or inside a hollow — are refused, so you don’t accidentally measure empty space.
Where it helps
- Anatomy teaching: move an axial plane down the torso and relate the 3D model to the CT slices students will read later.
- Medical research: show the relationship of a lesion to surrounding structures at the exact level you discuss in the text.
- Engineering: inspect wall thicknesses, internal channels, and fits in an assembly without a CAD licence.
- Architecture: cut a building model to produce live plans and sections.
Upload a layered model and cut through it in the browser.